
(Revised March 9, 2010, to add further information) A fortnight ago (less one day), I regaled you with a brief description of how I repaired a Waterman’s Model 5116 Ink-Vue Type 2 pen. Never one to rest on my laurels —as if I had any — I took on another of these infamous buggers today. This one showed up at the Nashua Pen Spa in the hands of our assistant Jim, and if I’m lucky he’ll let me keep it (for a price, naturally). My chances are pretty good; he had two of them, both in Jet. One was a very nice 5116, the other a pretty example of the last hurrah of Waterman’s Ideal Nº 7:

Yup, this is the pen I got to play with. Jim did the 5116.
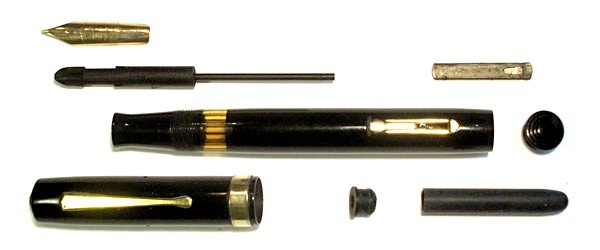
Here’s the Nº 7 disassembled, with its new sac in the picture for good luck:
A point in passing is that this pen is pretty near the last gasp for the Tip-Fill feed as well as for the Nº 7. By 1940, if the information I have is correct, Waterman had given up on the Tip-Fill feed and reverted to the venerable Spoon feed, now called the Inquaduct. Whether that decision came about due to the additional cost to make the feed or because of the feed’s reputed inferior writing characteristics is unknown, at least to the personnel of the Nashua Pen Spa.
Okay, about that new sac. The original sac, a Waterman exclusive, looked something like this (faked in Photoshop):
The pen’s barrel has a groove into which the thickened flange fits. My reconstruction of Waterman’s assembly technique is that they dropped that little nipple down the barrel — there is no separate section — and then inserted the sac. With the sac fitted, they pushed the nipple up into the open mouth of the sac to seal it and hold it in place. The problem facing a modern repairer is how to do that without a special sac.
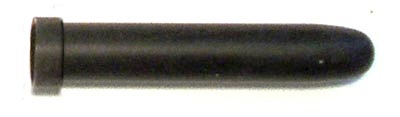
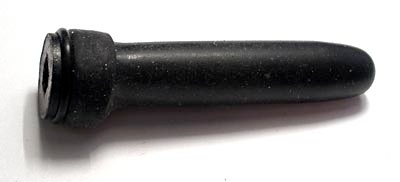
The problem revolves around the diameter of the barrel and the diameter of the things that go into it. Without that special sac, you need some other way to create the required diameter of the sac and nipple. I described it two weeks ago, but without pictures it’s tough to convey what’s really going on. To start with, here are the sac and nipple in close-up:
This is a Nº 18 sac, cut to about 15/8” long.
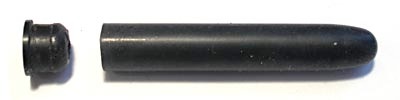
My first attempt, after I’d long since given up on trying to do it the way Frank Dubiel described it in Da Book, was to pull the sac over the nipple to increase the diameter. This worked spectacularly well on the 5116. Here’s a photo showing the wrong (upper) and right (lower) ways to install the sac on the nipple. (This isn’t a composite photo, by the bye — we were working on two pens, remember.)

As you can see, in the lower version I’ve pulled the sac down farther until it encloses the flange on the nipple. in the 5116, this was precisely what I needed. But in the Nº 7 today, it left the pen leaking. I needed more. The “more” I decided on was a 6 mm × 1 mm O-ring. To install it, I first folded the mouth of the sac backward to create a space for the O-ring right next to the nipple’s flange:
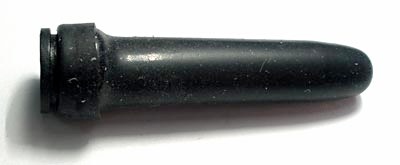
Then I installed the O-ring:
Finally, I rolled the sac back over the O-ring and the flange:

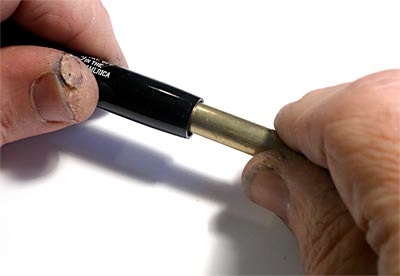
I was now ready to insert the sac into the barrel. For this, the required tool is a length of 5/16” brass tubing from a hobby shop. This tubing has a wall 0.014” thick, and it slides over the sac perfectly to rest against the nipple. To avoid cutting holes in the sac, you need to deburr the end of the tubing and sand it very smooth. Here’s the beginning of the installation operation, with the tubing fitted over the sac. Remember to slather Vacumatic lubricant over the end of the sac before starting the insertion; it’s important to make sure that the sac will slip along the barrel instead of slipping off the nipple. As you insert the sac, be careful that the secondary lever in the barrel is lying along the inner surface rather than protruding into the space where the sac needs to go.

And here’s the finish point, with the sac inserted into the barrel and pushed down into position. (Pay no attention to the ugliness on my left thumb; that’s where I lost an argument with a chef’s knife a couple of weeks ago. It doesn’t hurt anymore.)
After the sac is installed, a tongue suction test is in order to ensure that the pen isn’t leaking. It took more than one try to seat the sac right in this pen. Once you’re sure that the sac is right, you can use a fine wooden skewer or plastic toothpick to spread talcum powder all around the sac inside the barrel. Reinstall the pressure bar, screw in the barrel’s end button, and test the pen. If you got it right, use it. If not, try again…
Completely unrelated to the filler repair was the fact that this pen’s clip had suffered the loss of the two tabs (“ears”) that secure it into the cap. The pen’s former owner (not Jim, somebody before him) had cleverly glued the clip into place, and it just wasn’t a winning job. So I removed the clip, soldered a formed piece of sheet brass onto the back of the clip to replace the two missing tabs, and cleaned all the glue — quite a lot of it — off the cap. Pull the inner cap, slip the tabs through the slot, bend the tabs apart and press them flush against the inside of the cap, reinstall the inner cap, and le voilà, a properly clipped cap!


