
Today, two Waterman pens came up that tripped the “gotta blog about this” trigger.
What’s the point?
First was an Ideal Nº 55 that Jim picked up to restore. This pen isn’t a gorgeous collector specimen by any means, but it has a very interesting nib.
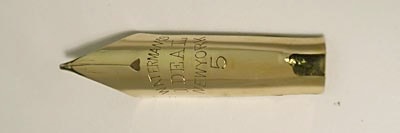
It’s a Nº 5 New York nib — a nice early one — but it’s not a wet noodle or a stub or some other exciting tip shape. It didn’t need de-pretzeling or any other major fixing. So what’s so interesting about it? Well, if you look carefully near the base, you’ll see that the way the highlights and shadows is a little funky. There’s a bump there.
A bump? What kind of bump? We looked on the other side to see what kind of punch might have made the bump, and here’s what we found:
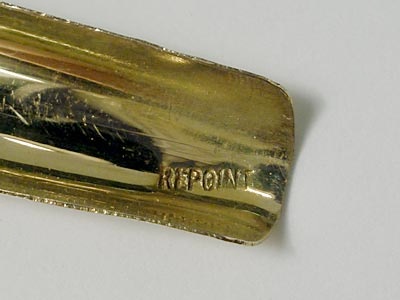
REPOINT. What does that mean? If you have an old Waterman instruction sheet handy, you’ll probably find a list of repair parts and services. One of the items in that list is a repointing service. Today, we call it retipping. So what’s interesting about this nib is that it’s an authentic factory retip. Try to get one of those on your Visconti or Pelikan or Montegrappa — or even your Montblanc. Baby, this is a rare nib!
Building a bridge
The other Waterman was one of a group I’ve been working on for a couple of days. This was a Hundred Year Pen that arrived in pretty scraggy condition. It wanted basic restoration, nib repair, and a new barrel end.
So I did the nib and the basic restoration, and made a new end for its barrel. As I reassembled the pen, I discovered to my dismay that the lever box was cracked. It hadn’t broken all the way through, but at some point it had taken a really hard push inward, and it was broken on the underside of the pivot pin’s holes. This is a much less tragic break than the more usual one that happens when someone tries to operate the lever of a pen with an ossified sac. When that happens, the lever box bulges upward and finally breaks on the upper side of the pivot’s holes. This is not reparable; the only solution is to replace the lever box.
But the downward break seemed rife with possibilities, and I was determined to see whether I could save this lever box. (After all, the supply isn’t infinite.) So I took the box out of the pen and set to work.
What a repair like this calls for is some sort of reinforcement along the bottom edge of the lever box. There’s a nice strip of metal running across the box at about its middle, and that would be a great place to solder such a reinforcing part. I considered bending a wire and soldering it to the cross-strip and along the edges of the box to bridge the break, but I wasn’t convinced that I could make a wire serve well enough. So I cut a piece of 0.010” sheet brass into a U shape.
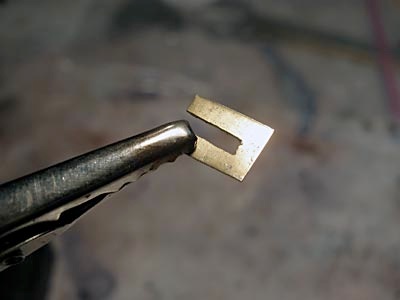
The base of the U would mate with (and be soldered to) the cross-strip, and the arms of the U would lie along the sides of the box. After a little cleanup to widen the slot, flatten the sheet, and clean one surface for soldering, I soldered the U-piece in place:
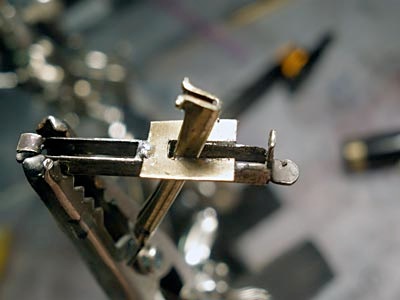
On the surface of the U-piece that you can’t see here, I built up extra solder, and by carefully applying the iron while clamping the base of the U in position, I sweat-soldered the two arms of the U to the edges of the box sides. Now, it’s obvious that the thing wasn’t going back into the pen like this, so I then had to cut away the parts of the U that protruded sideways past the sides of the box. This left very narrow strips in place, holding everything nice and tight.
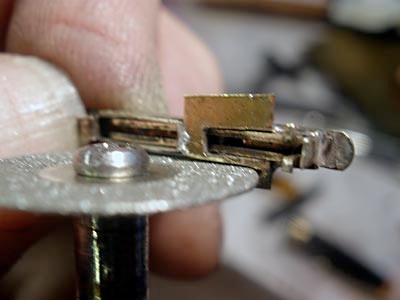
The cutting implement here is a diamond cutoff wheel in a Dremel rotary tool. The cutting process generates a fair amount of heat from friction, so in order to keep from re-melting the solder I had to go very slowly. Once I’d finished the cutting, I cleaned up the outsides to smooth everything and make it all fit through the slot in the barrel. Here’s the finished repair work.

And that’s it. Back into the pen went the lever assembly, snap into place went the pressure bar, and here’s what I ended up with:
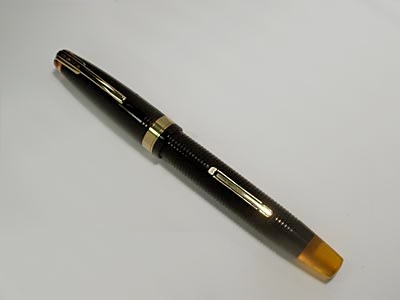
This is now a quite lovely Hundred Year Pen, and I really think its owner will be as pleased with it as I am.


