
In 1938, Waterman France began selling cartridge-filling fountain pens. The cartridges were glass. These weren’t the first glass-cartridge pens — that honor probably goes to Eagle, back in the 19th century — but they were practical, they worked well, and they paved the way for the plastic cartridges we use today. World War II put a crimp in Waterman’s style, but business picked up again after the War, and there are some very nice examples floating around. This pen, whose model name I don’t know, is the one that really hooked me on these beasts.

The primary problem facing the owner (or would-be owner) of a Waterman glass-cartridge pen is making the pen work. The cartridges are quite robust, and one often finds a perfectly good cartridge inside one of these pens. What wasn’t robust was the rubber seal that Waterman used to connect the cartridge to the nipple and seal the ink inside.
This week, I acquired this pen, a Commando:

(I know it’s a Commando because the word COMMANDO is imprinted on the clip.) It came to me in a group of pens for repair, and it was intended to be a nib donor for another of the pens in the group. The owner didn’t want this pen back, and for a moment I thought I didn’t want it, either. (Both the cap and the barrel were cracked as if someone had crushed it.) But then I realized that it’s a cartridge pen, and that was enough to convince me I wanted it.
I did some cosmetic restoration to fix the cracks, and then I set about repairing the rubber seal using a technique that I first heard about from David Nishimura. It’s not a difficult repair, but it’s one that seems not to be well known.
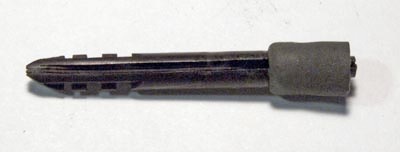
Getting the guts out of the section entailed the usual application of an ultrasonic cleaner, after which I pushed the feed out backwards. (The nib was already gone, remember.) Here are all the parts except the cap, cleaned and laid out for inspection:
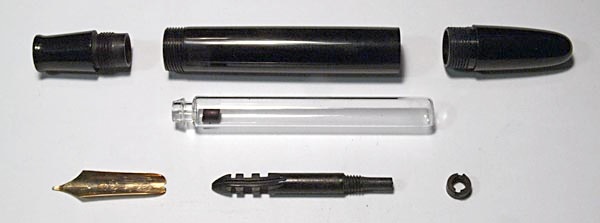
(The black thing inside the cartridge is the rubber plug, which the pen’s sac nipple pushes in when you install a cartridge. And the nib is the English Waterman flexie that I pulled from my nib box to put into the pen.)
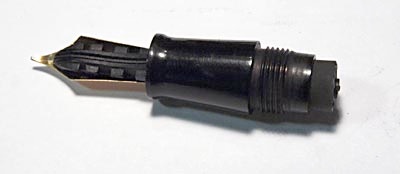
The components we care about right now are the section (top left), the feed (bottom center), and the nut (bottom right) that screws onto the back of the feed. When Waterman built this pen, the assembly of these components also included a rubber seal (black in this drawing):
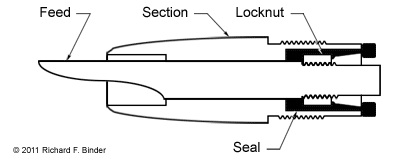
(This drawing is actually of the section from the first pen at the top of this entry, but the back part is the same.) The seal isn’t in the photo above because, as seems always to be the case, it was dead. The first step in repairing the pen is to make a new seal. For this I used a Nº 19 sac. I cut 15/32” (12 mm) of the closed end and snipped a small hole in the very tip:
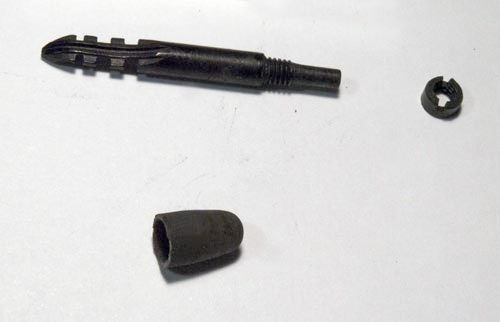
To install the seal, I forced it over the back end of the feed and screwed it down until it stopped. I then everted it to expose the threaded part of the feed, and screwed the nut down as tightly as it would go without risking damage:
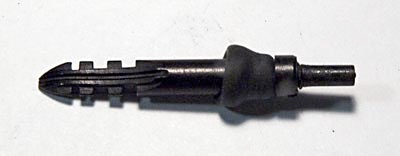
With the nut installed, I returned the sac to its original shape:
The next step was to insert the feed from the back of the section. Holding it as firmly in place as possible, I then installed the nib from the front. Here is the completed section assembly:
At this point, I test-fitted the empty cartridge:
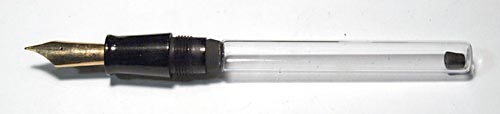
It fits. And when I fill it, it doesn’t leak. But it does write. I think it’s a pen!


